Flowcharts are a great way to make your complex processes easy to understand. They help you to better explain the idea in your presentation. MS-Word offers you creative ways to create beautiful flowcharts. A flowchart uses simple graphics to make it easy to understand the complete process with different stages that follow a logical order. Also, these are easy to create and do not require any technical expertise. Just follow these steps to create flowcharts in MS-Word
1) Open the word document in which you want to create flowcharts.
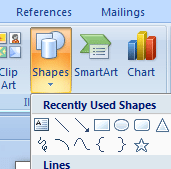
2) Click on Insert, then Shapes on the Ribbon to select a shape from Flowchart section.

3) You can now draw an outline for the size of this object. You can adjust the size of the canvas by manipulating the corners.
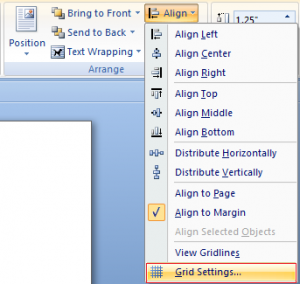
4) Now, it is recommended to enable the grid so that you create uniform shapes. For this, go to Format tab, click Align and select Grid Settings.
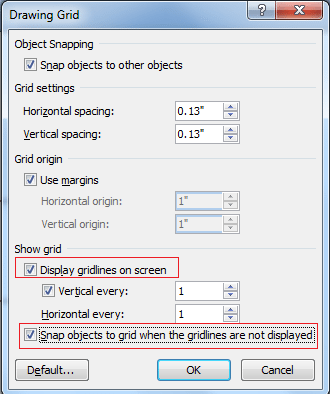
5) Check the boxes for displaying gridlines and snapping objects.
6) With canvas active, select the Insert tab and click Shapes. Create the shape and you can also change the color and outline style using tools in Format tab.
7) You can also add text to a shape. Right-click on it and select add text from the menu. Click on the image and start typing.
8) To link different shapes, there are a multitude of options. Go to Insert tab and open Shapes. Select the line style that you like the most. Start the line in the box and drag it to the second shape and so on.
9) You can remove the gridlines to see how the final object looks on the word document.
In this way, you can continue to add as many shapes as you want in your document and format them accordingly. Microsoft Word offers you a wide variety of formatting options such as selecting the shape color, shape size, 3D and canvas effects and lots more. This will result in creating stunning flowcharts in MS-Word document.
These were the simple steps to make flowcharts in MS-Word. If you have anything to add to this story, let us know in the comments section.


